This one is just in time for the Holidays! Yeah, I know it's been like a year since I last posted, but hey - take what you can get! These little smores' pops will be perfect for pre or post Thanksgiving parties where there will be lots of kids. I know tons of kids who don't like pumpkin or pecan pie, plus who wants to waste the good stuff on the kids anyway?
Thanksgiving Turkey Smores' Pops
Makes 20ish
Ingredients:
- 1 box honey Graham Crackers
- 5 Extra-Jumbo-Huge Campfire Marshmallows
- 5 regular/large marshmallows
- 1 bag candy corn
- 1 C real chocolate chips
- 1 bag thin pretzel sticks
- Bowl of powdered sugar
Other Supplies:
- Set of 3 circle cutters - 2", 1", 1/2"(perfect size set available in the cake baking section of Michaels or Hobby Lobby for cutting fondant - they make great regular cookie/small biscuit cutters!)
- Candy melting/icing bag OR quart ziplock
- 20 4" cake pop sticks (optional)
- Cake pop display (optional)
So, just to be clear - this is not a FAST craft/treat. It is, however, an easy one, and you won't need any special skills or knowledge to put these cute little guys together. They are fine at room temperature, and the only possible problem will be the crackers going stale. Wrap the plate or pop stand lightly with several overlapping layers of plastic wrap to keep out the air and they should be fine for a day or 2.
Step One - Melt the Chocolate
This needs to happen first because the chocolate will actually be too warm and thin at first, and we want it to thicken up before we need it. Pour about 1/2C of real semi-sweet chocolate chips into the corner of a quart baggie or candy/icing bag. Fake chocolate-flavored chips won't melt or set up properly. Even cheap real chocolate will work fine here. Set it into a bowl or coffee cup so it won't start dripping out the top, and microwave for 30 seconds. Remove and try to squish the chocolate. It won't be ready yet, so nuke it again for just 15 seconds. Squish and nuke again for only 10 seconds. Do this a couple more times until about 2/3 of the chocolate is melted, and it is just barely warm. DO NOT LET THE CHOCOLATE GET HOT!! Once you feel a warm patch, hold the top closed and just knead and squish until the rest melts with it's own warmth. Set this aside - it will be plenty soft for the next 20-30 minutes. Melt more when needed.
Step 2 - Cut out the Graham Crackers
The first graham crackers we need are for the Turkey's Body Base. Stack the crackers 2 high and cut right through them with the 2" cutter. I was amazed that they didn't crack or crumble! The edges aren't perfect, but that's ok. For 20 pops, you'll need 40 2" circles total, so get cuttin'! This cracker cutting process is extremely messy and wasteful. Scoop all your edges and scraps into another baggie to save for a graham cracker pie crust for Thanksgiving! While you're in cutting mode, you might as well cut the rest of your circles and be done with the mess. Cut 20 1" circles and 20 1/2" circles as well. You will probably have enough large edge pieces for all your smallest circles. Use a pretzel stick to pop the smallest circles out of the cutter when they're stuck. Maybe make a few extras for breakage.
Step 3 - Make The Turkey's Tail
 |
| I hadn't added the legs yet here |
Lay out 20 of your 2" circles on a cookie sheet, large cutting board, cooling rack, or whatever else you want to leave them on to dry. You'll want a couple of inches between them so they are easy to work with. Snip a very tiny corner off your chocolate bag. If you are using a baggie, you'll want to watch for tearing - the hole may stretch out and get to big, and you'll need to squirt it all into a fresh bag. If you're using a candy/icing bag this won't happen. Make a thick-ish half circle of chocolate across the top of your cracker, and an upside-down 'V' at the bottom. Go ahead and do all of them now so the chocolate can continue to set up. If your chocolate was already too cool, nuke it again but only for 5 seconds. Once it's been melted it re-liquifies very quickly. Just be sure to pinch the tip closed when you knead it ;-)
Press 5 candy corns into your semicircle, points down, for the tail. Now, take one thin pretzel stick, break it in half, and make 2 legs sticking out at the bottom. You can do one turkey at a time, or do all the tails then all the legs - it doesn't matter. Chocolate cools slowly. (But only when you're waiting for it to cool. If you need it to stay warm and and soft, it cools too fast... go figure.)
Step 4 - Cut the Marshmallows
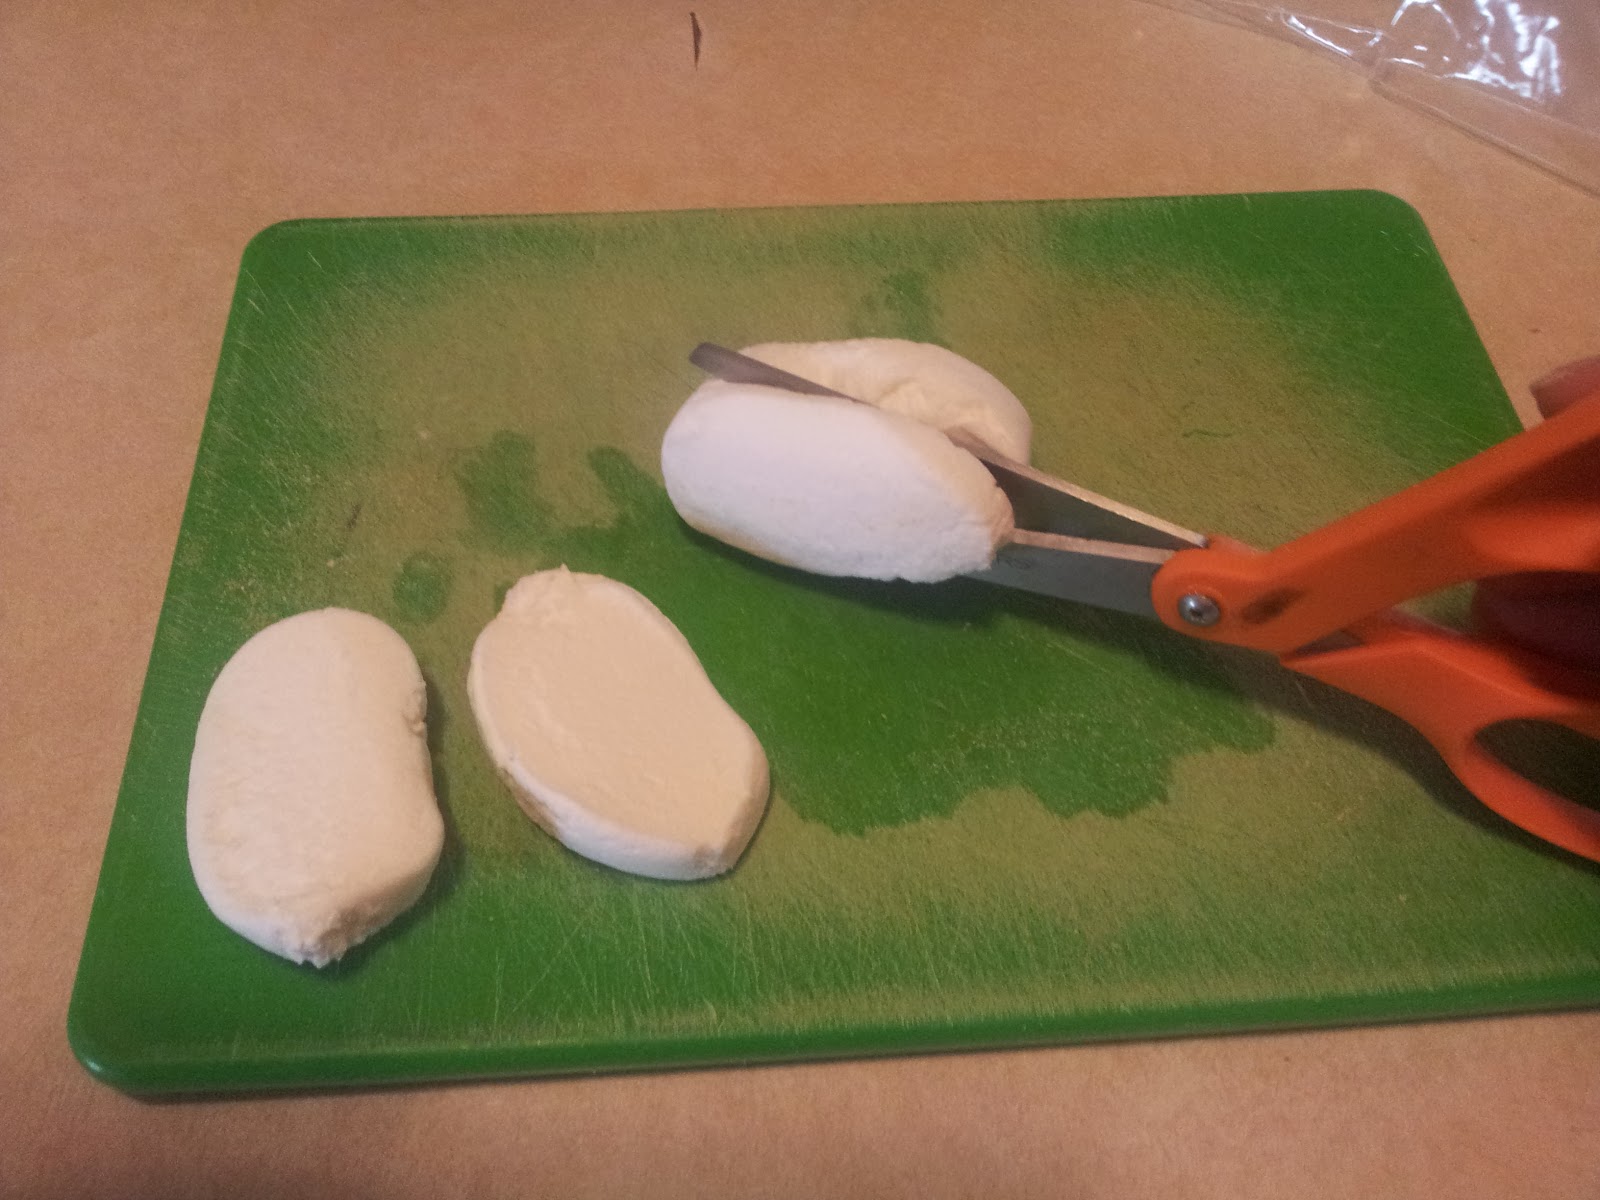
Now comes the sticky part. Wash a pair of scissors with dish soap, then use them to cut your jumbo and regular marshmallows into 4 slices each. Cut each 'mallow in half, then each piece in half again - you want to end up with jumbo discs about 1/2" thick, and regular discs around 1/4" thick. After each slice is completed, drop it into the powdered sugar. When they are all done, flip and pat the pieces so the sticky sides get coated with sugar - now they won't stick to your hands! Pat them well to remove excess then you can toss them all into a pile or onto a plate and put away the powdered sugar and clean up the large cloud of white powder you just created. Your scissors will appreciate a trip through the dishwasher.
Now, go back to your tails. Make another semicircle of chocolate on top of the tips of the candy corn, and another upside-down "V" over the legs. Since these are the highest points, this is the only place the marshmallow will touch. Now gently press a jumbo 'mallow disk onto each tail, roughly lining it up with the cracker. Since it isn't sticky, you can re-round it a bit first from where the scissors flattened it. Hopefully, your tail has cooled enough by now that the candy corn doesn't move out of place, but keep an eye on them anyway.
Step 5 - Add the Pop Stick and Front of Body
 |
| Originally, I tried to stick the legs into the sides of the mallow. No Fun. Gluing them into chocolate worked much better. |
This next part is quick and easy, but do just one turkey at a time for this round. Make a thick-ish line of chocolate, about 1" long, right between the legs. Press a cake pop stick onto the chocolate, make another thick line of chocolate on top of the stick and a swirl on the 'mallow, then press the other 2" graham cracker on top. The weight of the cracker will hold the stick down in the chocolate. (at some point during all of this you'll need to melt more chocolate. You can use the same bag, just pinch the hole closed while kneading) Repeat for all Turkeys. Of course, you can skip the stick altogether and just serve these on a plate.
Step 6 - The Rest of the Turkey
 |
| My first 4 Turkeys didn't get sticks. I forgot. |
Whew! You're over halfway done! Now the rest is just squirt and stack! Make a blob of chocolate near the bottom and place a regular 'mallow disc, then more chocolate and the 1" cracker. Make a thin line of chocolate from the bottom of the cracker to the middle, then press on a single candy corn, with the point up. You may want to do them all up to this point to let the chocolate set up holding the candy corn. The last step is to make a small blob of chocolate at the top of the candy corn to stick on the 1/2" cracker. Now add eyes and a beak and you are done!!
You'll want to give these guys at least 2 hours to dry. You can check them by picking one up and flexing it gently around the stick - to see if the stick tries to peel out of the chocolate or not. If the chocolate is solid and only the 'mallow stretches, then they are cool enough to place in your pop stand! You'll need to space them out, since they are so much bigger than regular cake pops. Tail-to-tail works well.
These are a lot of work, but not hard. They are pretty crummy to eat, but no more than regular smores - and at least the chocolate and marshmallows aren't squishy! Impress all your friends this Thanksgiving Day with these cute Thankgiving Turkey Smores' Pops!